Friday, 26 September 2014

Thoughts on Scale

I am becoming more interested in making models that fit to the scale stated in the background. Space Marines are described as 7.5 - 8 foot, and very bulky, enough to dwarf a normal human.

GW generally sculpt to heroic scale, something we see a lot in comics and computer games, which is usually over sized muscles and, in the terms of women, very curvy. We sort of see this in movies, with perfectly sculpted men and women who would need to spend most of their days down the gym to achieve such results.

For Space Marines this is fine, they should be oversized. The problem is, GW sculpted their human models exactly the same, so your Imperial Guard grunt is the same size, although slightly less bulky, then the genetically enhanced Space Marine. When they brought out the plastic Space Marines, they did make them slightly larger, but gave them bow legs which brought them down to the level of human models, later plastics have addressed this, and Forge World tends to have better poses, and are sculpted to a more realistic scale. Also, newer Imperial Guard kits, particularly the plastic storm troopers, are smaller. But even with these changes the height differences is not enough.

So the art of 'True Scaling' has developed. There are several methods to achieve this. The first, and one I have been practicing for a few years, is to add plastic spacers to areas of the body. Depending on the result, you could add 1mm to the thighs, and the waist, or you could add, it to the lower legs, upper legs, waist, neck, and even use it to make the torsos bulkier. I usually think it's enough to add to the legs, waist and neck. This is fairly easy to do with plastic models as plastic cement does a really good job of bonding the spacers to the model. With resin models I find it requires a little more patience, as the superglue needs longer to creat a good bond between spacer and model.
The above has had 3mm added to it.

Now this method gives the model a slender, more human look and it removes the heroic scale for a more natural one. The second method adds both height and bulk. This method involves taking terminator legs and converting, by sculpting armour, them to resemble power armour. This also requires a lot of work on the torsos to get right, and also involves making new shoulder pads to fit the larger bulk. I don't have any example of this, but google Doghouse, Apologist and Migsula to get an idea of the effect.

Recently I have realised there is a middle ground, take terminator legs, particularly the new ones from Forge World and the newer kits from GW, cut off any part above the belt, then add a normal torso, and fill put the waist with pouches and grenades to add bulk. This is very simple but effective, and while experimenting I decided to take it a little further and add some height to the waist. I then sculpted the missing detail, added some of my own, and was finished. I think the effect is impressive, the model is larger and bulkier, then the original models, and the spacer style truescale.
The height and bulk of the model is created using terminator legs, some green stuff, and the extra gear on the waist.

I may further refine this method, add a little more fight to the waist to get an even bigger model, but I do feel this is on the right track to creating a space marine that fits the background. Lastly a scale shot, plastic imperial guard on the left, forge world space marine, spacer altered space marine, and lastly the newer truescale attempt.


Friday, 18 July 2014

You ain't seen me, right! German Recce vehicles

One of the things that any Flames of War army is incomplete without is reconnaissance. There are a number of options available to the German Army and SS troops, from motorbike troops to armoured cars and even some light tanks. In the end, I decided to go with what I wanted to paint!

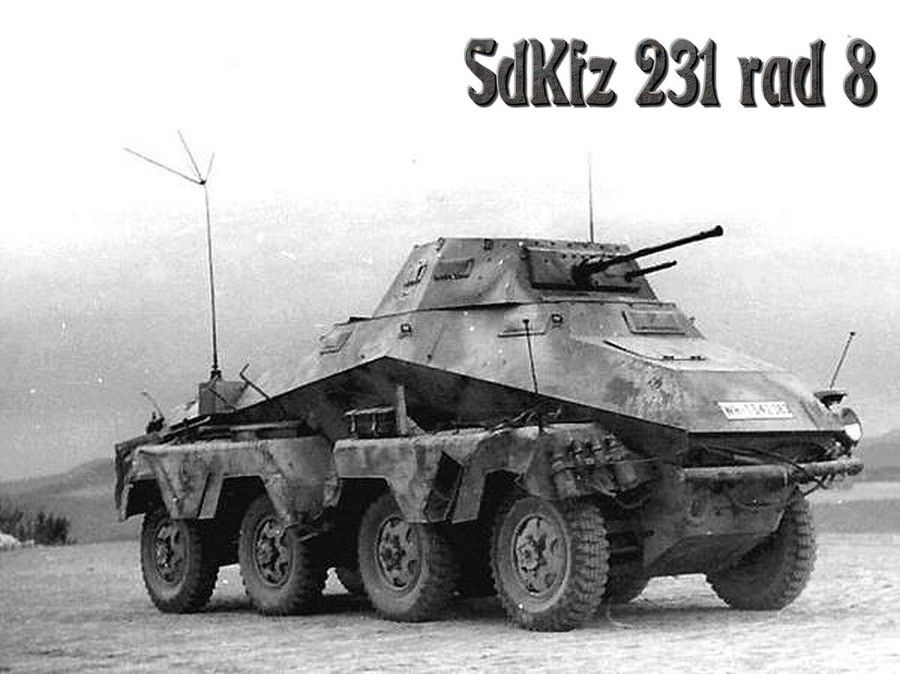
Schwerer Panzerspähwagen Sd Kfz 231 (8-rad)


Thursday, 17 July 2014

Huzzah.

So 15 months after I last managed to finish the painting of a model, I have finally completed the Word Bearer. Huzzah.

He is not perfect, but I am really happy how he came out. I would of liked slightly more of the darker brown-red to have remained, and been a bit neater with the hello high lights, but I can work on that. Not sure on the eyes, think they may need a bit more yellow. The base was meant to look like grey dust and ash from a dying city (Imperial Palace of Terra :) ) but the weathering powders I used came out darker. Again, I can work on it on future models.

The axe is very meh.mi was trying to give a purple sheen but it didn't work. Not really sure how to fix it, and tbh, have little enthusiasm to. It's something that can be fixed later. The shoulder lad has the chapter symbol. The chapters are named after star constellations, and I thought this looked sort of space. Kind of think it may be the way a more primitive people might depict they Eye of Terror. Now, I know from First Heretic, the Word Bearers had no idea what the Eye of Terror was, but the old faith may have an ancient understanding of it. Haven't got a name for the chapter yet though. Chapter of the Golden Eye, Chapter of the Gods Eye? Not sure.

Like the axe, the knife was an experiment gone wrong. It's supposed to represent a tainted weapon and I wanted a natural looking weapon, like stone, again, have little energy to go back and work on it at the mo, so will be done at a later date. Another thing I want to work on is my small scripts looks messy but I am sure I will get better as time passes.

Monday, 14 July 2014

Ready for painting

Finally got round to finishing mr Word Bearer, adding some personal touches to the model, such as parchment and candles, and tidying up some of the conversion work.

The legs are from the Mark IV legion set, with the left foot heated up and straightened, and the right leg moved backwards to give the impression of walking. The torso, left shoulder pad, and head both come from the Word Bearer upgrade set. Being on of the new kits it was perfect, no flash, no mould lines, and hardly any resin, making it easier to prepare for use. The arms are from Mark IV despoiler set, both straightened into a more natural poses the axe comes from the Sons of Horus command set, and the left hand is from the plastic chaos aspiring champion. You can't see in this picture but he is holding a knife. The pouches and grenades are from the Tigrus pattern bolt gun set. Everything else is green stuff.

The model has been given extra hight using 1mm plasticard, which I have inserted on the thighs, on the waist, and on the knock. This is to give the models a slightly more imposing look, and to tower over human models, as the background describes. Unfortunately I was a bit sloppy on the thigh area, hence the need to use green stuff to repair some damage.

I am looking forward to painting this model, but first I have to bug some red paint!

Friday, 11 July 2014

A Modelling Pilgrimage

So no painting recently, due to a teething baby who decided to throw her bedtime routine out the window for a week and general apathy. Last night I shook that off and decided to build something. This is a continuation of my search for a project I can stick to, as well as using some impulse purchases from some of Forge Worlds new upgrade kits.


He still needs a lot of tidying up, the left hand doesn't quite fit, and the right hand needs some work. I also want to add some devotional parchment and purity seals, and some other bits to finish the effect. Will this be the project for me? I have a few more ideas I would like to explore, so we will see.

Wednesday, 9 July 2014

StuG G Platoon

Having successfully painted the first of the StuG Assault Guns from the Open Fire! starter box, I set about finishing off the platoon by tackling the other two.

Here are the finished results. The only difference is that I used a darker paint for the green on the following two StuGs. Let me know which one you prefer 9assuming you can see the difference!), as that will form the scheme for all of my German vehicles.

I've also added some MIG Pigment and Citadel Typhus Corrosion to the tracks, track wheels and lower hull areas to add a bit of dirt and weathering to the miniatures.


That's all for the StuGs, next up we'll take a look at some Shermans I think!

Monday, 7 July 2014

Painting the StuG G - Part 2

Here's the link to Part 1, in case you haven't seen it:  Part 1

Thanks for coming back! When we left it in Part 1, we had applied the 50/50 mix of Chocolate Brown and Middlestone. The next job is to 'feather' on pure Chocolate Brown (Vallejo Model Color 872) in the centre of the brown camo areas, creating a gradient of colour.

After this we add the green in the same way. I've used a 50/50 mix of GW Moot Green and Vallejo Model Color 882 'Middlestone', followed by pure Moot Green. I wasn't convinced that Moot Green was the perfect colour to use; it was a toss-up between Moot Green and the darker Warpstone Glow (I don't have any of the equivalent Vallejo greens... blame the Dark Angels for that!).
 

Friday, 4 July 2014

Painting the StuG G - Part 1

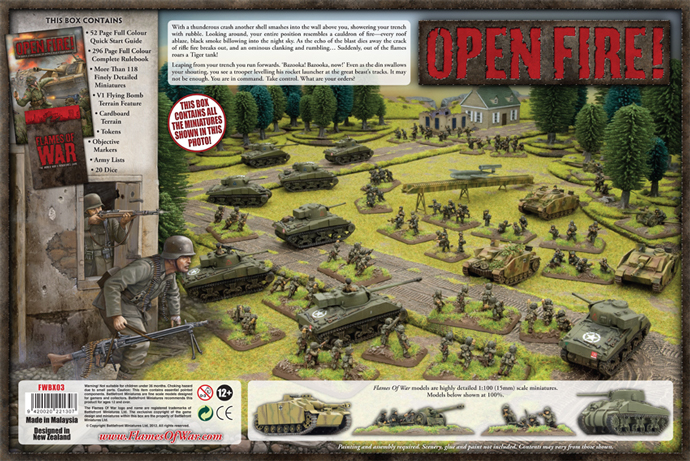
I recently started collecting a 15mm German Army. Apart from a few test stands of infantry, the first models I tackled in a serious way were the German StuG G Assault Guns from the Open Fire! box produced by Battlefront for its Flames of War game.

The StuG G in history


The StuG G, or the Sturmgeschütz III Ausführung G as it is more properly known, was the most widely produced variant of the Assault Gun class of German Armoured vehicles during World War II. Over 8,400 StuG G's were produced between 1940 and 1945 (out of a total of ~11,000 StuG III and StuH models), and they served extensively in all theatres except North Africa; 90th Light Division had a mere 2 StuG D assault guns in its 288 zbV Regiment at the Battle of Gazala in June 1942, an although more StuGs were sent to Tunisia in the closing days of the fighting in North Africa, they were never present in large numbers.

Thursday, 3 July 2014

Allied Army List

In the last Flames of War post we looked at the German Army list I will be making, so this time we will focus on their adversaries, the British! The basis for the list are the miniatures contained within the Open Fire! starter set. For the British these are:

 - 6 Sherman V tanks
 - 2 Sherman Firefly tanks
 - US Parachute Infantry platoon

Market Garden

At first sight this may look a little odd. Why are US paratroopers being sold alongside British tankers? However, if you think about Operation Market Garden, it all becomes clear. Market Garden was General Montgomery's plan to move the British sector of the Allied front 64 miles from the Dutch border all the way to Arnhem, securing the most important prize: A bridge over the Rhine.


Friday, 20 June 2014

German Army List

When starting to play a new game system, or when starting a new army within a currently played system, it is generally considered good practice to write an army list first, so that your purchasing and painting is goal focused rather than being based on the 'Ooh, shiny!' method.

Amazingly, I did actually follow this piece of advice with Flames of War (unlike with my 6,500 point strong Dark Angels successor chapter for WH40k!). Having made the decision to purchase the Open Fire! starter set due to its quality and cheap price, I then moved onto finding a list that used all of the bits included in the box, and which 'felt right' thematically.

The German forces in Open Fire! consist of:

 - 2 Grenadier platoons
 - 2 7.5cm PaK40 anti-tank guns
 - 3 StuG G assault guns
The Open Fire! starter box has 2 x 800 point starter forces, an Allied Armoured Company and a German Grenadierkompanie

Thursday, 19 June 2014

Getting a-head

After giving the model a grey undercoat this morning I was able to get started with the painting this evening.

I decided to base coat a mix of grey and silver in order to get a dark metallic base. I then washed the model with a mix of black and dark blue to start to darken the model. I think I was a bit heavy, and worried I may lose some detail, I used a wet brush to remove some of the wash, or redistribute a bit more evenly. I would rather build up several light washes then ruin the model with one heavy wash. As the model is still drying I haven't got any pics, but will hopefully take some tomorrow.

While the body dried I started on the face. The model has 2 main flesh parts, both challenging in different ways. The arms are bare, and while they start as flesh, around the elbows they turn into a living metal that Ferrus absorbed while killing the great silver Wyrm Asirnoth. The blending of flesh and metal shall be difficult but that's a bridge to cross later.

The second area of flesh is the face. The head is beautifully sculpted, and I want to keep the paint job looking realistic. Faces I have done in the past have looked cartoonish, but then I have always stuck to skin tone paints which are often unrealistic shades. I took a skin tone colour but mixed it with so e grey to get a colour that bizarrely matched my own. I then washed with Strong Tone, before a light wash of red. I then picked out the raised areas with the original mix, I found this to be a bit to contrasting so I gave the model a light wash of Strong Tone. This tired the reader areas with the lighter skin. I  red to work out the best colours to high light bit so far I am happy.

Tomorrow I hope to bring some pics of the work done on Ferrus body.

Wednesday, 18 June 2014

Flames of War German Adventure

I've been a bit of a hobby ostrich recently, burying my head in the sand pretending I don't have a stack load of miniatures to paint! I blame Games Workshop entirely!

In order to ease me out of my 6-month slump I thought I'd take a look at some Flames of War models. World War II has always fascinated me from a historical standpoint, so merging two of my main hobbies (miniature painting and military history) seems a fairly natural thing to do.

Where to start?

There are an enormous amount of options for the budding painter/gamer. I chose Flames of War as the base gameset to use, simply because it uses 15mm miniatures (very common) and is an easily accessible and popular game. There are a number of other rulesets out there that use 15mm miniatures as well, however, so its all good!

Tuesday, 17 June 2014

A new attempt

So I have a problem. I can't work on one thing for more then a few weeks before moving onto something else. In the last 5 years I have managed to finish 5 models. This year I told myself that would change, that I would paint a small army. Six months in, I have one half finished model to show for it (who I will finish, maybe). In order to brake this habit, I have decided to post my progress on one model, from start to finish, in the hope it keeps me on track, and hopefully inspire me to build more.

So what model? I decided it had to be a centre piece, and one that would be interesting to paint. My preference for Forge World, and especially their Horus Heresy range made the choice easy, I should paint a Primarch. The Primarchs released so far have been great, each full of character, telling a story with this pose. In the end I had to go with my favourite so far, Ferrus Manus, Primarch of the Iron Hands. They are a Legion I have always had a fascination with, but usually dismissed due to how one dimensional they are betrayed in the novels. Recently, however, I have begun to see them in a new light, and reading through their background as presented by Forge World has shown me a new side to their character. But more on the Legion in the future. For now, the model.

Perparation


I began by inspecting the model for any major faults. There was a small problem with the base, and the shoulder pads were missing a little bit of detail, but as it was nothing major, I decided to leave it. I soaked the models in warm, soapy water to remove the resin release agent left over from the casting process. The release agent can make parts difficult to glue together and effect painting so it's best to clean resin models before working on them. I left them to dry naturally to avoid any damage.

Assembly


I carefully removed the parts from the sprue, first attaching the body to the base, then building the rest of the kit. I kept the head separate to make painting easier (and to allow for all the obvious beheading jokes), and also the servo arms, which will be fiddly to paint once attached. These will be finished separately and glued to the main model at the end. I have also left the display base unbuilt. This is because I have not decided how I want to base the model yet. I want to keep away from the black sands of Isstvan V, as Ferrus armour is largely black. The display base has several dead marines on it, and the colour of these Legionnaires will depend on how I choose to base.

That's all I have done so far, tomorrow I hope to undercoat the model in preparation for painting.

Friday, 30 May 2014

EU IV Portugal AAR Part 27 – 1660-1675


1660-1675 King Filipe II, Part 4

This update starts with an embarrasing apology. Just 5 minutes ago, as I was preparing to start uploading photos, I accidentally deleted them all from my USB stick. Having already deleted them from the computer at home after I transferred them to the stick, they are gone forever. So this update will, unfortunately, be text based.... :(

Thursday, 29 May 2014

EU IV Portugal AAR Part 26 – 1651-1659


1651-1659 King Filipe II, Part 3

We get Military tech 17 in September 51, and start our attempt to close the technology gap

Wednesday, 28 May 2014

EU IV Portugal AAR - Intermission 1650

Once again we are back for our 50 year look at the world around us.

We normally start in mainland Europe, so let's not buck the trend.

A large part of central, eastern and northern Europe is the same as it was 50 years ago, albeit Prussia is a bit bigger and Poland is a bit smaller. Moving westwards, the Netherlands has formed and is holding its own, although I don't believe it has started colonising abroad yet. Great Britain is identical to 50 years ago; Wales had a short life, but was absorbed back into the British Empire quite quickly. Moving to the south there has been more fluidity. On the Italian peninsula, Genoa has completely disappeared, being annexed by Venice, and Castile has lost some of Iberia to me, but gained bit of territory along the Cote d'Azur. I have also annexed Granada. The biggest change though is that Aragon has disappeared, being diplomatically annexed by my faithful ally, Austria.

Tuesday, 27 May 2014

EU IV Portugal AAR Part 25 – 1640-1650


1640-1650 King Filipe II, Part 2

A slight change of format for this update. With my colonial interests ever growing, it becomes more and more tricky to report on my expansion in a sensible and meaningful way that isn't just a picture of a random island. So in future, I will just put a little section at the end of each update reporting important colonial matters, and make a bigger report at the 50 year intermission.

Anyway, on with the show. In October 1641, the Ottomans conclude their war with Yemen, taking the province of Asir

Friday, 23 May 2014

EU IV Portugal AAR Part 24 – 1633-1640


1633-1634 King Sebastiao I, Part 5

OK, so the answer to the question was..... we decide to make Vijayanagar a Protectorate. We really don’t need the overextension now of taking a load of new provinces, as we’ve spent a heap of admin power on coring recently and are falling behind. WE automatically become the war leader in Vijayanagar’s war against France

Wednesday, 21 May 2014

EU IV Portugal AAR Part 23 – 1623-1633


1623-1633 King Sebastiao I, Part 4

We’ve had four good years of peace following our war against the Yemen/Brunei/Makassar coalition, and have cored our new provinces. Religious conversion is taking some time though, especially in Brunei, where the Sunni religion imposes a 2% reduction in our missionary power. This doesn’t sound much, but it takes the time to convert out from around 3-4 years to 7-8 years. We’ll not finish converting Brunei for most of this decade.

In the middle of 1623 we get two Call to Arms notices from our allies. First, Austria calls us into a European-wide war in which Anhalt is being attacked by Brandenburg, Prussia, Hungary, Sweden and some others. We reluctantly accept the Call. Our aim is to avoid getting involved if possible.

Almost immediately afterwards, Morocco decides that the Canary Islands should actually be Moroccan, so attacks Castile. This war, unlike the other, we gleefully accept. Our aim in this war is to take Murcia, and block Castile from access to a Mediterranean port.

Tuesday, 20 May 2014

EU IV Portugal AAR Part 22 – 1614-1622


1614-1622 King Sebastiao I, Part 3

Here we are again, happy as can be. All good friends, and jolly good company...

Except for Yemen, Brunei and Makassar, who, you know.... ‘Delenda est’ and all that!